Kubernetes - Installing Cilium CNI
Table of Contents
This post is part of our ongoing series on Kubernetes. This post focuses on installing Cilium as the CNI in a K3s cluster. While K3s includes its own default networking stack, Cilium provides an alternative that leverages eBPF for networking, security, and observability. This setup can be useful for scenarios requiring more granular network policies, improved performance, or deeper insights into cluster traffic.
This guide specifically targets installing Cilium in kube-proxy replacement mode, which eliminates the need for the standard kube-proxy component and allows Cilium to handle all service routing more efficiently using eBPF.
1. Disable K3s Components
The first step is to configure /etc/rancher/k3s/config.yaml to disable the default networking components that would conflict with Cilium:
1write-kubeconfig-mode: "0644"
2disable-kube-proxy: true
3disable-network-policy: true
4flannel-backend: none
5disable:
6  - servicelb
7  - traefik
This configuration:
- Disables
kube-proxy, as Cilium will replace its functionality - Disables the default
network-policyimplementation = Setsflannel-backendtononeto prevent the default CNI from starting - Additionally disables
servicelb(the default load balancer) andtraefik(the default ingress controller)
Next step is to remove the traefik manifest from the auto-deploy directory:
1rm /var/lib/rancher/k3s/server/manifests/traefik.yaml`
After applying these changes, restart the K3s service to apply the configuration:
1systemctl restart k3s
For a complete clean slate, it’s recommended to reboot all cluster nodes. This ensures any lingering network configurations are cleared.
2. Install Cilium
Now we’ll proceed with installing the core Cilium components using the cilium CLI. This approach provides a streamlined installation experience compared to manually applying manifests:
1cilium install \
2--version 1.17.1 \
3--set=ipam.operator.clusterPoolIPv4PodCIDRList="10.42.0.0/16" \ --set=kubeProxyReplacement=true \
4--set k8sServiceHost=192.168.1.19 \
5--set k8sServicePort=6443
This command configures Cilium with the following critical parameters:
- Retains the IPv4 CIDR range of K3s (10.42.0.0/16) for pod addressing
- Enables full kube-proxy replacement mode
- Specifies the Kubernetes API server endpoint (required for kube-proxy replacement mode since internal service discovery depends on it)
3. Configure Cilium with Flux
To ensure our Cilium deployment remains consistent and follows GitOps principles, we’ll configure it through Flux CD. This allows us to declaratively manage the Cilium configuration and leverage automated reconciliation.
Create cluster/default/cilium.yaml
 1---
 2apiVersion: source.toolkit.fluxcd.io/v1
 3kind: HelmRepository
 4metadata:
 5  name: cilium
 6  namespace: kube-system
 7spec:
 8  interval: 10m
 9  url: https://helm.cilium.io
10---
11apiVersion: helm.toolkit.fluxcd.io/v2
12kind: HelmRelease
13metadata:
14  name: cilium
15  namespace: kube-system
16spec:
17  releaseName: cilium
18  interval: 10m
19  chart:
20    spec:
21      chart: cilium
22      version: "1.17.1"
23      interval: 10m
24      sourceRef:
25        kind: HelmRepository
26        name: cilium
27        namespace: kube-system
28  values:
29    operator:
30      rollOutPods: true
31    nodeIPAM:
32      enabled: true
33    kubeProxyReplacement: true
34    ipam:
35      operator:
36        clusterPoolIPv4PodCIDRList: ["10.42.0.0/16"]
37    defaultLBServiceIPAM: nodeipam
38    nodePort:
39      enabled: true
40    k8sServiceHost: "192.168.1.19"
41    k8sServicePort: "6443"
42    envoy:
43      enabled: false
44    hubble:
45      relay:
46        enabled: true
47      ui:
48        enabled: true
This configuration includes several important customizations:
- Implements
nodeIPAMmode to associate Node IPs withLoadBalancerservices, crucial for clusters without an external load balancer - Enables
nodePortsupport to expose services on node ports ( which to be consumed by Ingress controller for traffic routed via the cloud server setup done in Kubernetes - Routing external traffic to local Kubernetes cluster ) - Sets
defaultLBServiceIPAMtonodeipam - Disables Envoy in
DaemonSetmode since the embedded proxy mode is sufficient for smaller clusters, reducing resource consumption - Enables Hubble (with both relay and UI components) for enhanced observability and traffic visualization
Lets commit and push these change to Git repository, and Flux will automatically apply the configuration to the cluster.
4. Verify Setup
Once the deployment has been reconciled, validate the Cilium installation with the following command:
 1cilium status
 2
 3    /¯¯\
 4 /¯¯\__/¯¯\    Cilium:             OK
 5 \__/¯¯\__/    Operator:           OK
 6 /¯¯\__/¯¯\    Envoy DaemonSet:    disabled (using embedded mode)
 7 \__/¯¯\__/    Hubble Relay:       OK
 8    \__/       ClusterMesh:        disabled
 9
10DaemonSet              cilium                   Desired: 2, Ready: 2/2, Available: 2/2
11Deployment             cilium-operator          Desired: 2, Ready: 2/2, Available: 2/2
12Deployment             hubble-relay             Desired: 1, Ready: 1/1, Available: 1/1
13Deployment             hubble-ui                Desired: 1, Ready: 1/1, Available: 1/1
14Containers:            cilium                   Running: 2
15                       cilium-operator          Running: 2
16                       clustermesh-apiserver
17                       hubble-relay             Running: 1
18                       hubble-ui                Running: 1
19Cluster Pods:          24/24 managed by Cilium
20Helm chart version:    1.17.1
21Image versions         cilium             quay.io/cilium/cilium:v1.17.1@sha256:8969bfd9c87cbea91e40665f8ebe327268c99d844ca26d7d12165de07f702866: 2
22                       cilium-operator    quay.io/cilium/operator-generic:v1.17.1@sha256:628becaeb3e4742a1c36c4897721092375891b58bae2bfcae48bbf4420aaee97: 2
23                       hubble-relay       quay.io/cilium/hubble-relay:v1.17.1@sha256:397e8fbb188157f744390a7b272a1dec31234e605bcbe22d8919a166d202a3dc: 1
24                       hubble-ui          quay.io/cilium/hubble-ui-backend:v0.13.1@sha256:0e0eed917653441fded4e7cdb096b7be6a3bddded5a2dd10812a27b1fc6ed95b: 1
25                       hubble-ui          quay.io/cilium/hubble-ui:v0.13.1@sha256:e2e9313eb7caf64b0061d9da0efbdad59c6c461f6ca1752768942bfeda0796c6: 1
To verify that kube-proxy replacement is functioning correctly, use the following command to inspect the detailed status:
 1kubectl -n kube-system exec ds/cilium -- cilium-dbg status --verbose
 2
 3...
 4KubeProxyReplacement Details:
 5  Status:                 True
 6  Socket LB:              Enabled
 7  Socket LB Tracing:      Enabled
 8  Socket LB Coverage:     Full
 9  Devices:                enp1s0     192.168.1.19 2402:a00:402:60a4:cf53:64d7:94f3:90bd 2402:a00:402:60a4:5054:ff:fec2:f7c8 fe80::5054:ff:fec2:f7c8 (Direct Routing), wg0  10.0.0.2
10  Mode:                   SNAT
11  Backend Selection:      Random
12  Session Affinity:       Enabled
13  Graceful Termination:   Enabled
14  NAT46/64 Support:       Disabled
15  XDP Acceleration:       Disabled
16  Services:
17  - ClusterIP:      Enabled
18  - NodePort:       Enabled (Range: 30000-32767)
19  - LoadBalancer:   Enabled
20  - externalIPs:    Enabled
21  - HostPort:       Enabled
22  Annotations:
23  - service.cilium.io/node
24  - service.cilium.io/src-ranges-policy
25  - service.cilium.io/type
26BPF Maps:   dynamic sizing: on (ratio: 0.002500)
27...
28Encryption:       Disabled
29Cluster health:   2/2 reachable   (2025-03-11T08:57:33Z)
30Name              IP              Node   Endpoints
31  192.168.1.19 (localhost):
32    Host connectivity to 192.168.1.19:
33      ICMP to stack:   OK, RTT=255.745µs
34      HTTP to agent:   OK, RTT=268.478µs
35    Endpoint connectivity to 10.42.1.34:
36      ICMP to stack:   OK, RTT=211.23µs
37      HTTP to agent:   OK, RTT=432.791µs
38  192.168.1.24:
39    Host connectivity to 192.168.1.24:
40      ICMP to stack:   OK, RTT=196.433µs
41      HTTP to agent:   OK, RTT=574.349µs
42    Endpoint connectivity to 10.42.0.68:
43      ICMP to stack:   OK, RTT=510.047µs
44      HTTP to agent:   OK, RTT=1.232687ms
45Modules Health:
46...
This confirms that all necessary service types are correctly supported by Cilium’s kube-proxy replacement functionality.
5. Accessing Hubble UI
Now that Cilium is successfully installed with Hubble enabled, lets access the Hubble UI to visualize and analyze your cluster network traffic. By default, the Hubble UI is only accessible from within the cluster, but cilium cli supports shortcut to portforward and access it.
1cilium hubble ui
2  Opening "http://localhost:12000" in your browser...
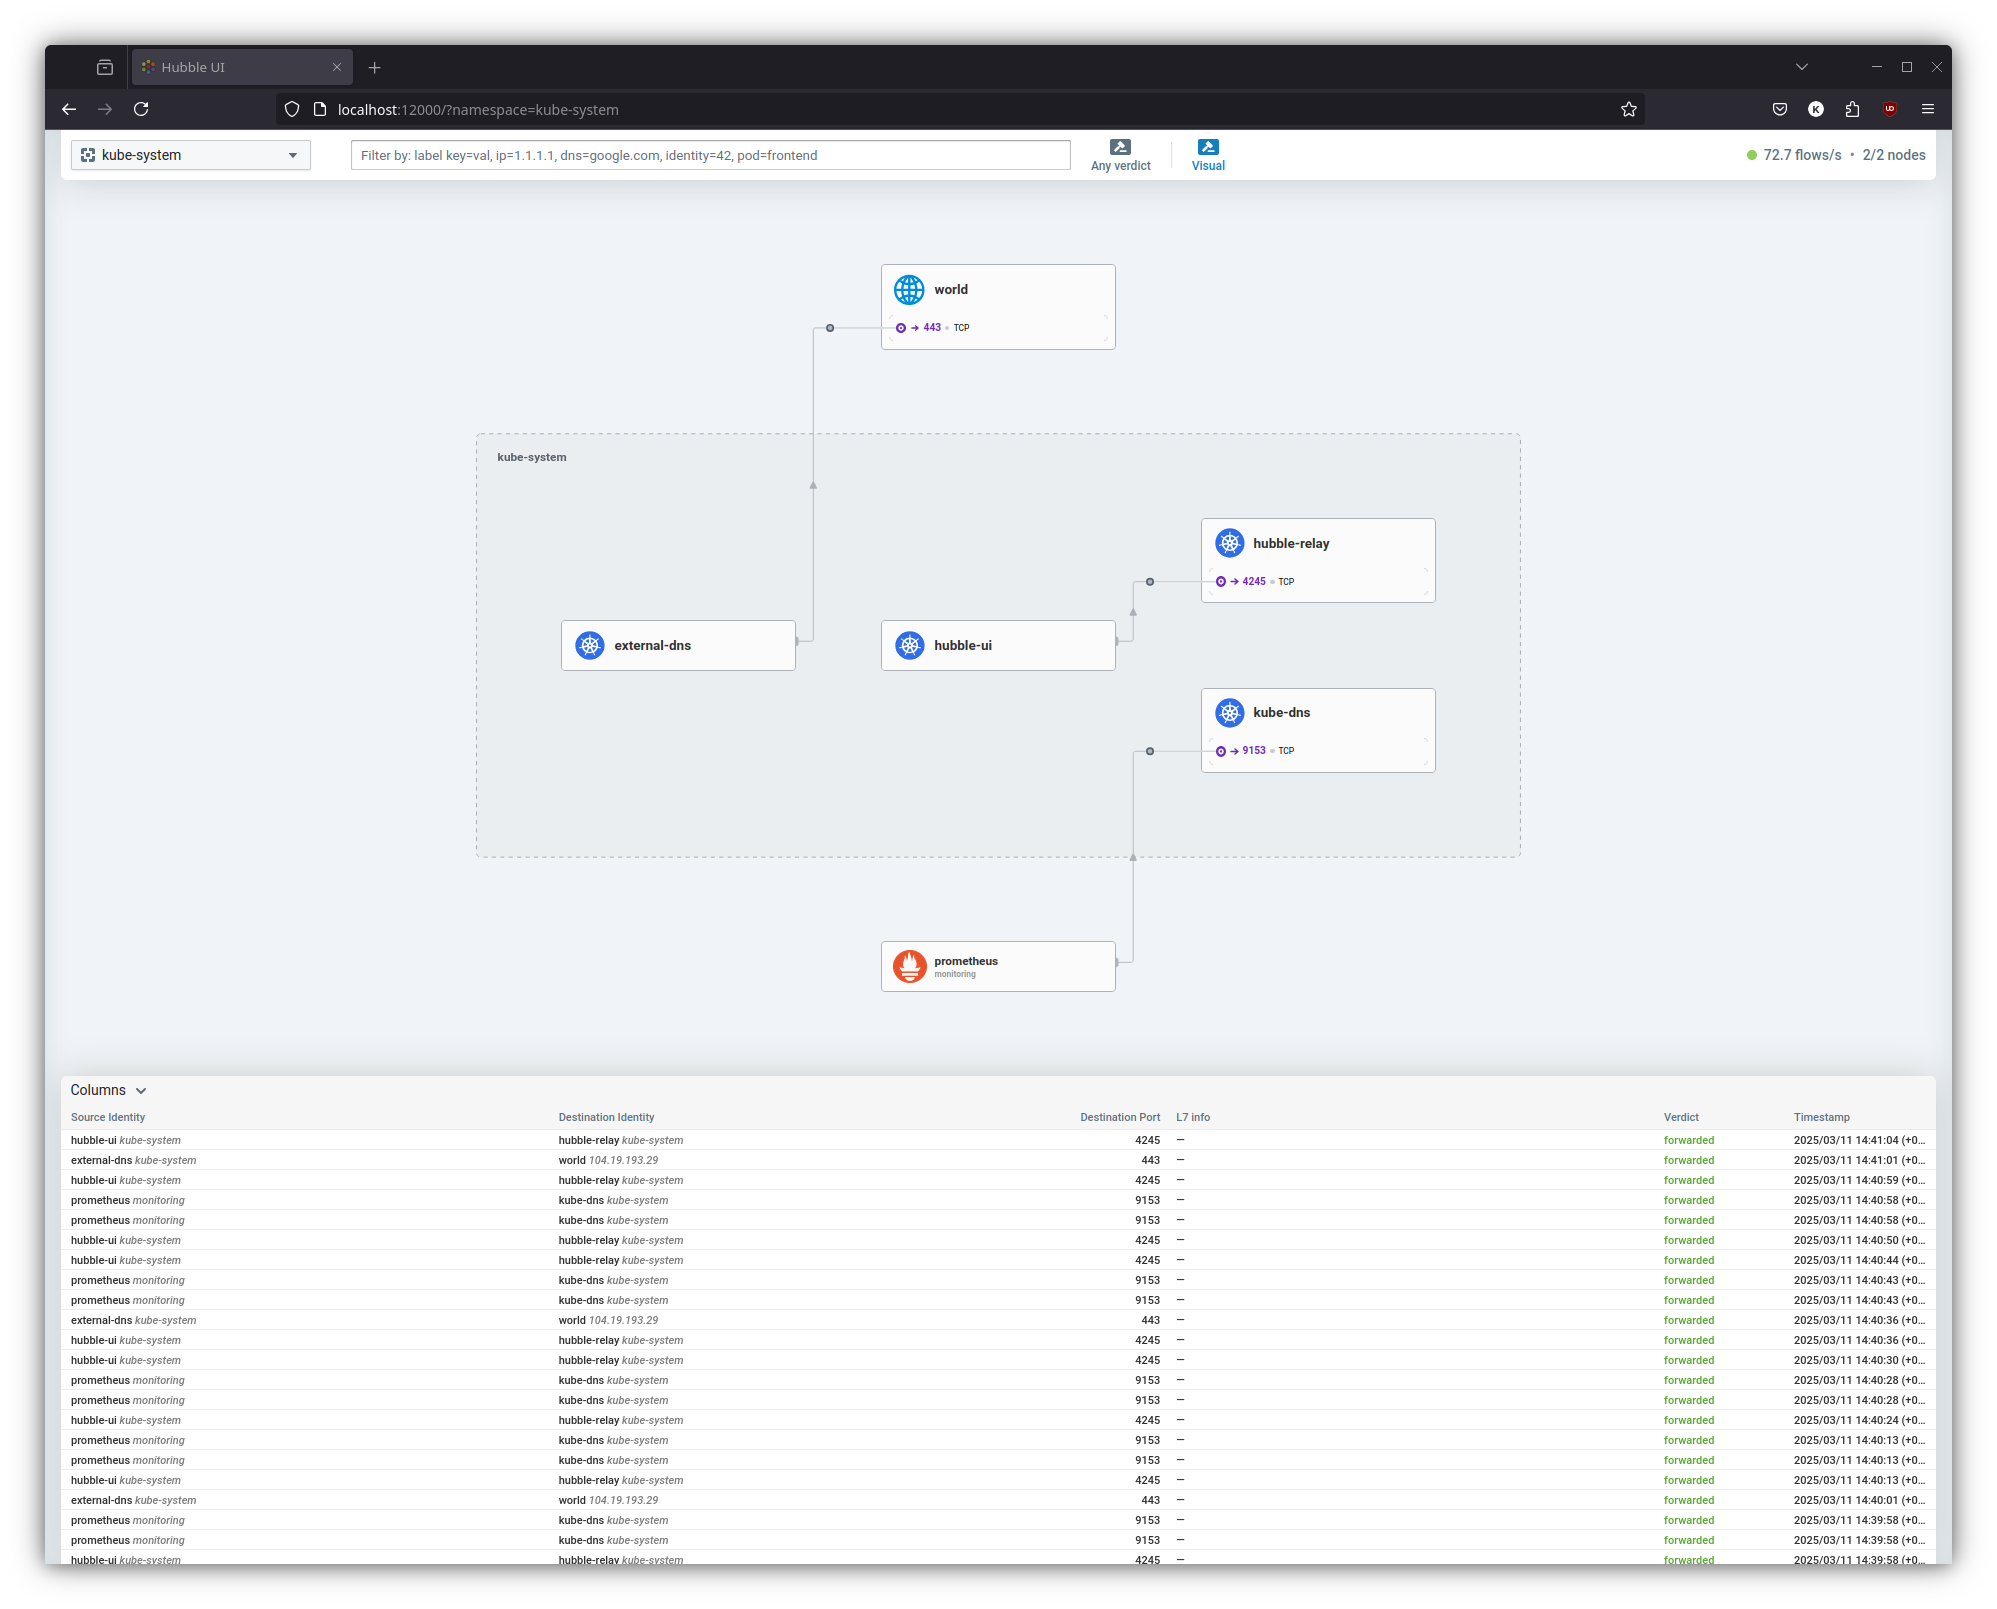
The interface provides detailed visualizations of pod-to-pod communication, service dependencies, and network policies enforcement.
References
- Cilium installation in K3s - https://docs.cilium.io/en/stable/installation/k3s/
- Node IPAM LB - https://docs.cilium.io/en/stable/network/node-ipam/